EDDI 19 Technical Training Day – Learning Objective 1: Task 1 – Building a Docker container from source
Overview
Teaching: 5 min
Exercises: 5 minQuestionsObjectives
- How do I build my application on the CESSDA infrastructure?
- Building a Docker container from source using Jenkins
Task 1 – Building a Docker container from source
Requirements
To complete this task, a source code repository must be provided. This repository must contain an implementation of the CESSDA Coffee Machine and must be buildable with ‘docker build .’.
Analysing the Jenkinsfile
A sample Jenkinsfile should have been provided in the source code repository. It outlines the steps that Jenkins will perform in order to build the container.
Environment section
The environment section sets variables that are used in the pipeline.
environment {
    product_name = "cafe"
    component_name = "coffee-name" // name should be replaced by your name
    image_tag ="${docker_repo}/${product_name}-${component_name}:${env.BRANCH_NAME}-${env.BUILD_NUMBER}"
}
The product_name variable uniquely identifies a product in the CESSDA infrastructure. It is used to create namespaces in Kubernetes and is used as an identifier for Docker tags to ensure uniqueness.
The component_name is used to identify each component in a product, for example: Searchkit in the CESSDA Data Catalogue (CDC). For this training day, the component name uniquely identifies your coffee machine.
The image_tag variable takes the previously defined variables, combines them with the variable docker_repo and composes an image tag from them. This ensures that the image tag is created in a structured way and is consistent across all CESSDA projects.
Stages section
The stages section defines the steps required to build, test and deploy a component on Jenkins.
stages {
    // Basic Docker Build
    stage('Build') {
        steps {
            sh "docker build -t ${image_tag} ."
        }
    }
}
Stages are composed of stage blocks that logically separate phases of a build (i.e. compile, test, analysis and deploy). Each stage contains a steps block that runs phases of the build. The most common step will be the sh command, used for running shell commands.
Building on Jenkins
The provided Jenkinsfile should be enough to build your application. Make sure to set the component_name variable so it reflects your own name (i.e. for Matthew, the component_name would be set to “coffee-matthew”).
To create a job on Jenkins, select New Item. The job name should match the repository name. Select Multibranch Pipeline to continue to the next screen.
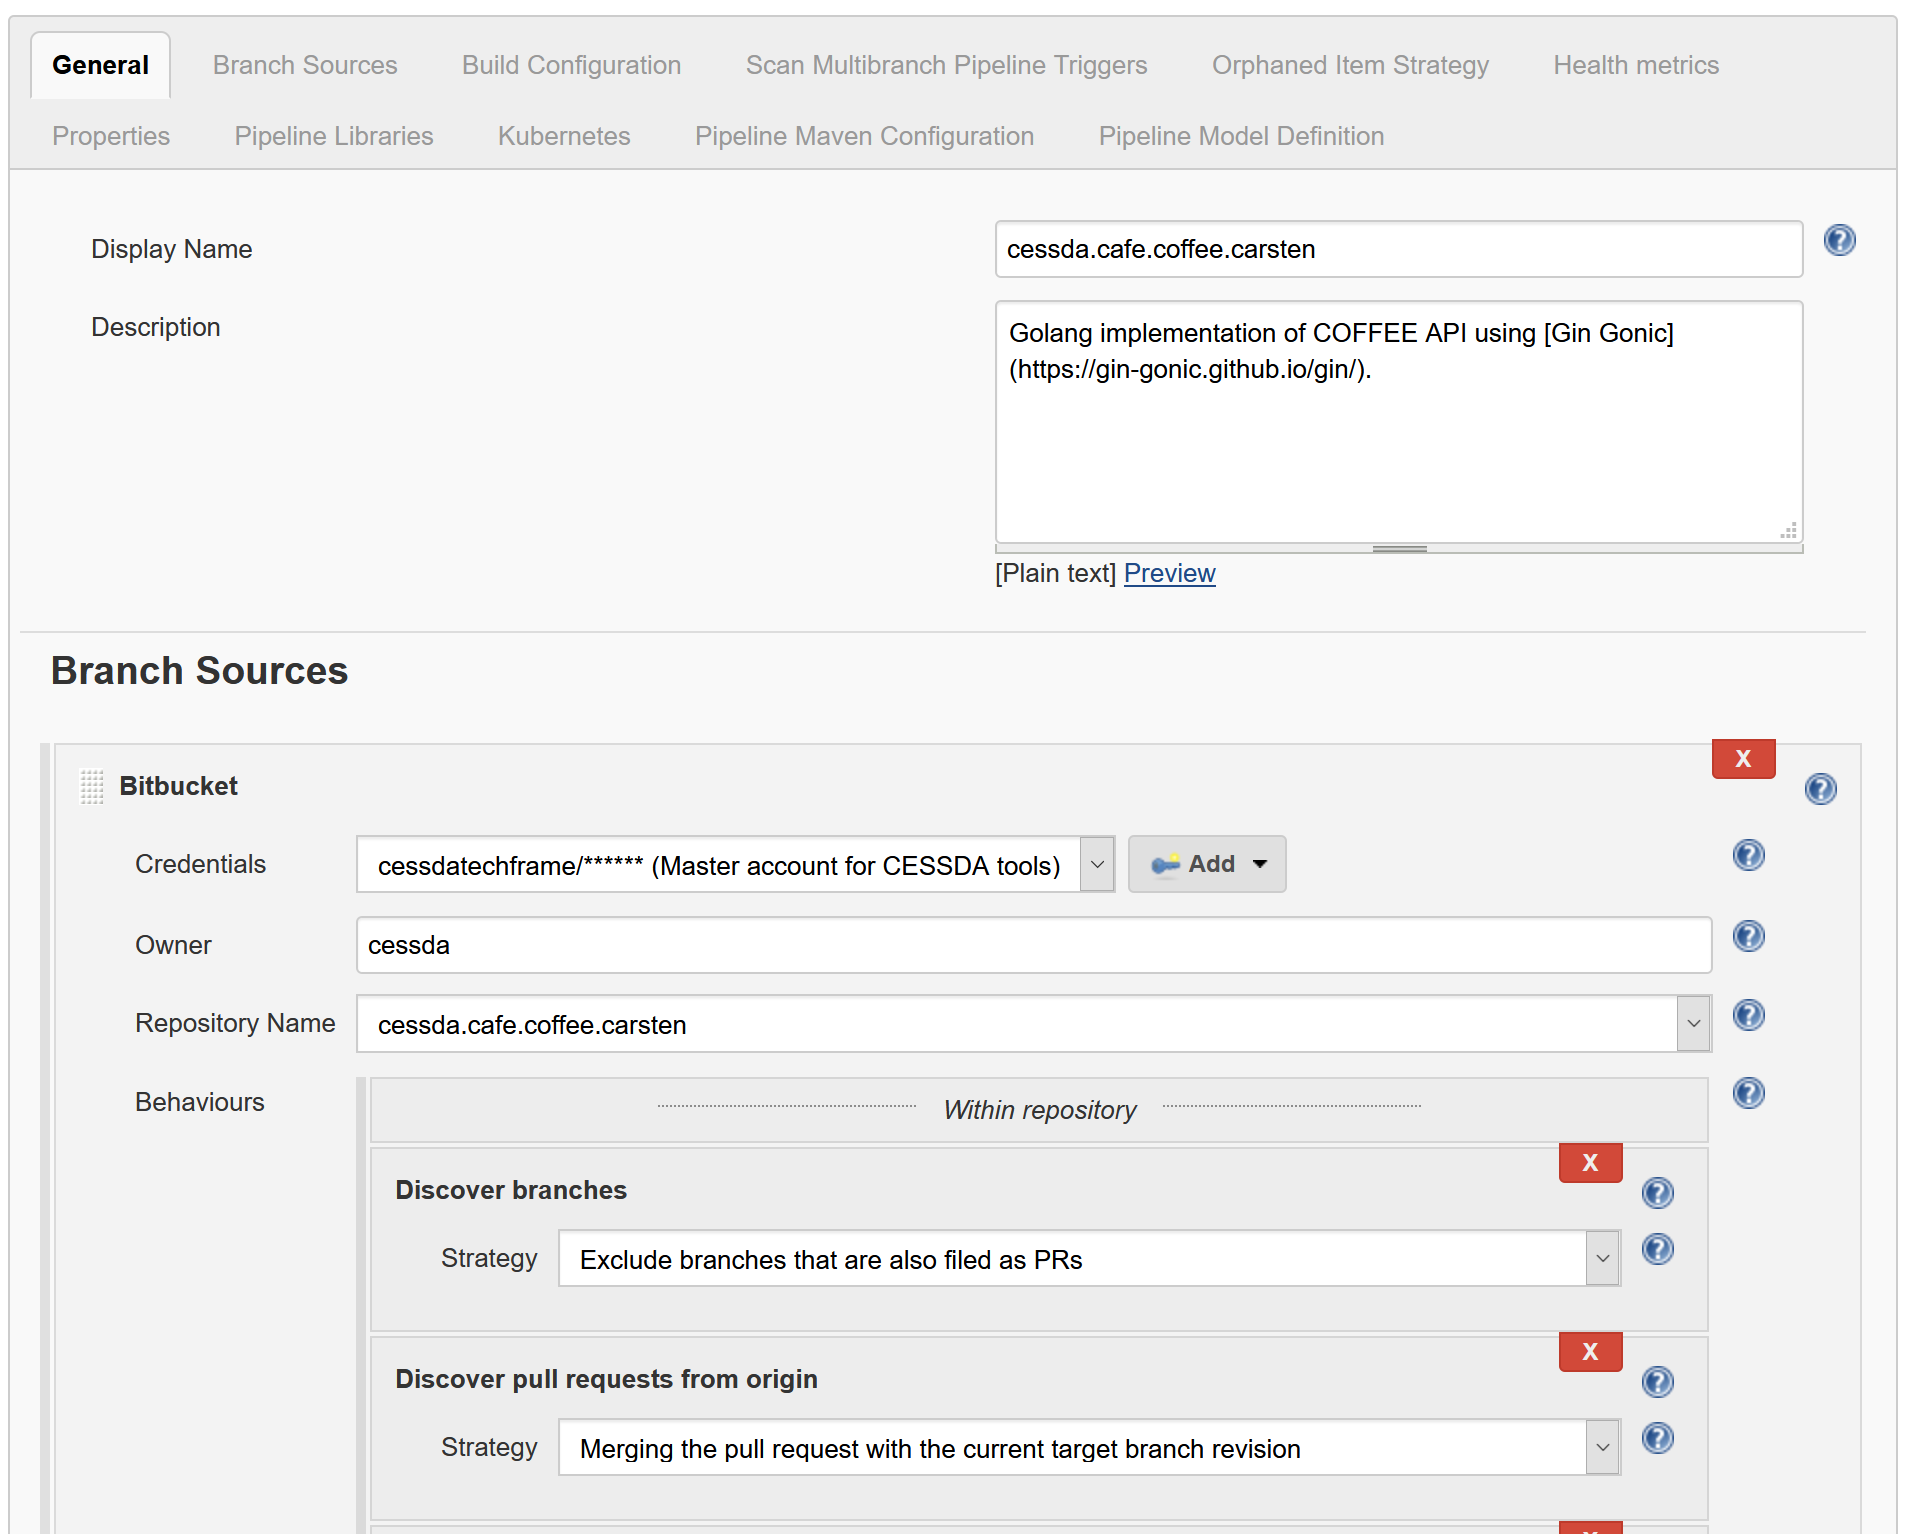
Under Branch Sources select Add Source, then select Bitbucket. Set the credentials to the cessdatechframe account and the owner to cessda. The dropdown list should now populate.
Select your repository, then click apply. If everything is set up correctly a build should start for all detected branches in the repository.