EDDI 19 Technical Training Day – Learning Objective 1: Task 3 – Static analysis with SonarQube
Overview
Teaching: 5 min
Exercises: 10 minQuestionsObjectives
- How do I ensure my code is of a good quality?
- Running Sonar Scanner analysis
- Displaying Sonar analysis in SonarQube
Task 3 – Static analysis with SonarQube
Requirements
To complete this task, the programming language used must be one of the languages supported by SonarQube.
Analysing with SonarQube
Setting up your project to be analysed with SonarQube differs depending on what framework is used.
For frameworks without Sonar Scanner integration, the settings for the project are defined in sonar-project.properties. Some settings must be set for the analysis to run. These are:
- sonar.projectKey - Uniquely identifies the project in SonarQube
- CESSDA standard is
eu.cessda.${product_name}:${component_name}
- CESSDA standard is
- sonar.sources - The location of the source code
- Defaults to the root directory, but should be explicitly set
It is recommended to set sonar.projectName so that a friendly name is displayed in the SonarQube interface.
Gathering test coverage statistics depends on the framework used. See https://docs.sonarqube.org/7.9/analysis/analysis-parameters/ for the full list of analysis parameters.
To run SonarQube on Jenkins define the tool in the environment section using this snippet.
scannerHome = tool 'sonar-scanner'
This will set the location of the SonarQube scanner and install it on the agent if it’s not already installed. To run the scanner, use the following stage.
stage('Run Sonar Scan') {
    steps {
        withSonarQubeEnv('cessda-sonar') {
            sh "${scannerHome}/bin/sonar-scanner"
        }
    }
}
The withSonarQubeEnv block sets the location and the credentials of the CESSDA SonarQube server. This allows the sonar-project.properties files to be portable and reduces strict dependencies on a specific Jenkins installation. It also allows users to run an analysis on their local machine by running a local SonarQube instance.
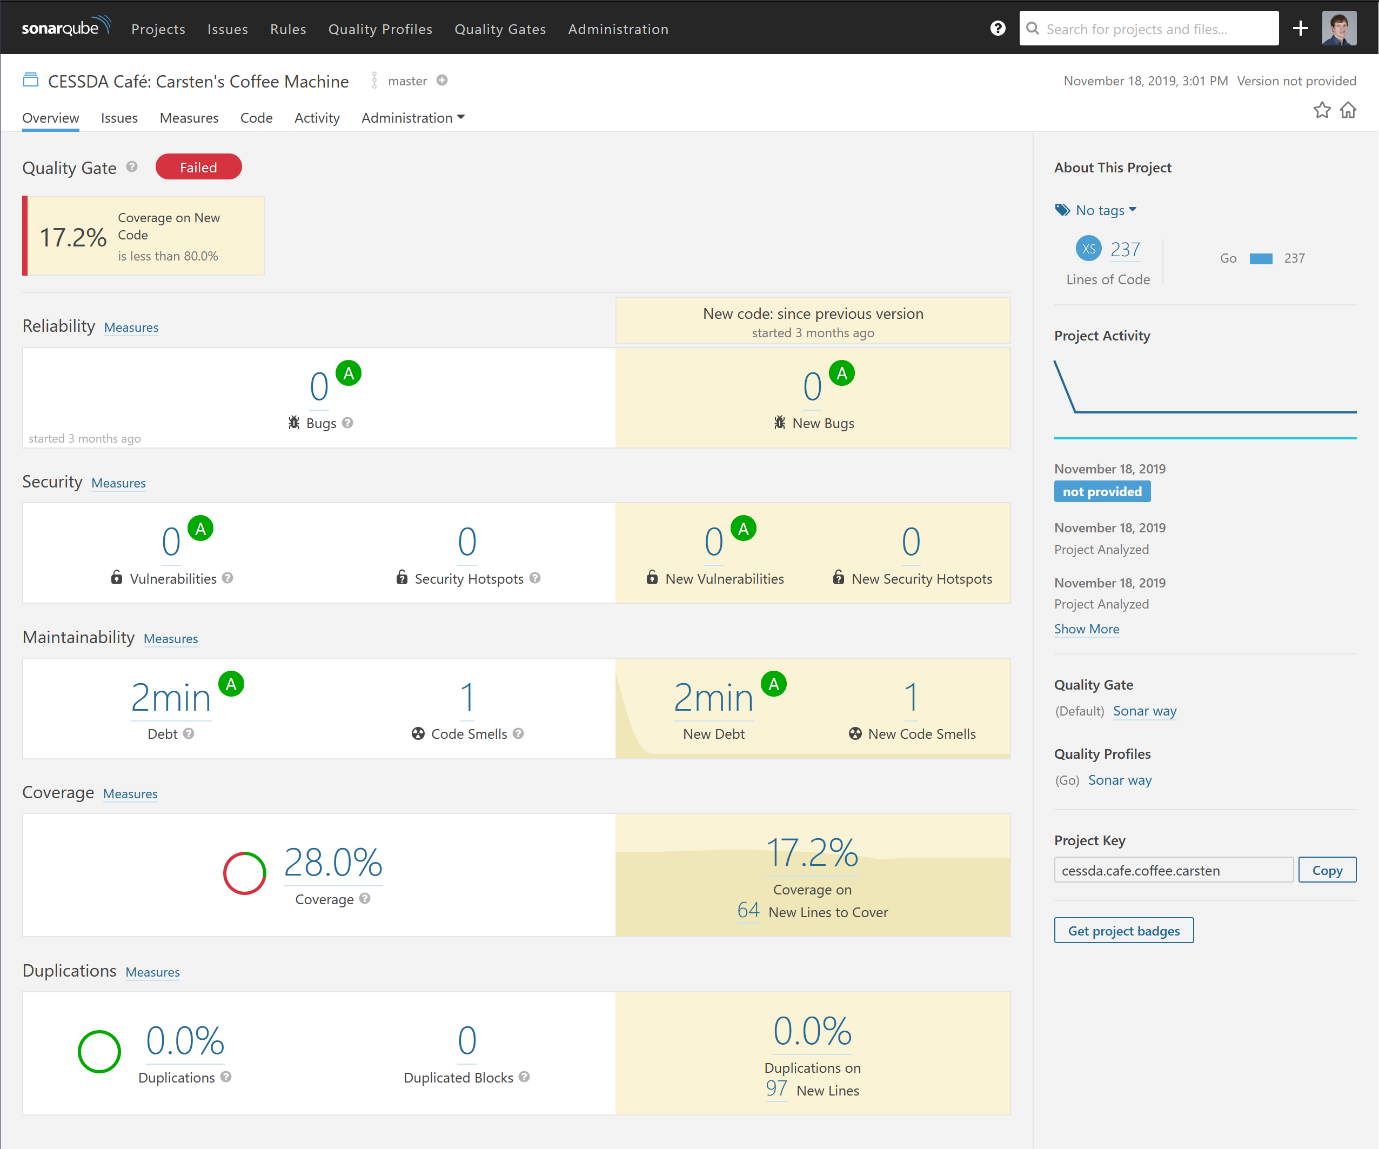
Once an analysis is run navigating to the project page in SonarQube should display a page like the image below.